Blazor MS-Teams Tab App Series – Part 4

Welcome to the fifth post (0-4) of a series that will show you how you can write a Microsoft Teams Application with Blazor Webassembly.

You will find the complete source code in this github repository. I placed my changes in different branches so you can easily jump in at any time.

Fetching access tokens,…

To create some access tokens we first need to create an Azure Active Directory Application Registration for our Blazor-Tab Application.

Therefore navigate to https://portal.azure.com and select your tenant. Then switch to Azure Active Directory and select App registrations from the left panel. You can navigate there directly by using this link.

AAD App Registration

Click +New registration to register a new AAD application

  • Name: BlazorApp
  • Account Type: Accounts in any organizational directory (Mulitenant)
  • Redirect Uri: Leave that empty for now

and click Register.

Make sure to copy your Application (Client) ID and store it for later. I am using the following Client-ID throughout the samples which need to be replaced with yours: a97275e3-965d-4076-90dd-76cce240e8fb

IMPORTANT

Microsoft Teams will only allow AAD Application Scopes/Redirect URLs that are in the premitted domain. Make sure that you use your NGROK or registered domain here!

Select Expose an API under the Manage section and set an application ID Uri. You can reuse the given UID from the proposed App ID Uri. For example:

  • api://demo.ngrok.io/a97275e3-965d-4076-90dd-76cce240e8fb

Now select +Add a scope to add the required "access_as_user" scope:

  • Scope Name : access_as_user
  • Who can consent: Admins and Users
  • Provide some titel/text for the information that is displayed when the administrator of a tenant or a user is asked to grant consent.

Finally click Add scope to add the scope. You will get an url that looks like this:

  • api://demo.ngrok.io/a97275e3-965d-4076-90dd-76cce240e8fb/access_as_user

To directly allow Teams to access we add the well known client IDs of the Microsoft Teams-Applications. There are two of them: Microsoft Teams Web Client and Microsoft Teams Desktop Client

Use the +Add a client application button to add the following client ids. You need to also select the scope "access_as_user" so that the Teams-Apps can access this specific scope!

  • Teams Web Application: 5e3ce6c0-2b1f-4285-8d4b-75ee78787346
  • Teams Mobile/Desktop App: 1fec8e78-bce4-4aaf-ab1b-5451cc387264

Since we also want to create further access tokens for Microsoft Graph and our own API with this AAD-Application we create a client secret that we will use to create those tokens. Make sure that the client secret is never stored in a client application! It should always be in a trusted environment.

Click on Certificates & Secrets under the Manage section and create a new client secret by selecting +New client secret

Also copy that client secret. I am using this one (it is invalid now, of course):

  • B._12b.spZ391IGzr-Yg0T09Ug9D1erP.f

Click on API permissions under the Manage section to add permissions to access the graph. We do want to add delegated permissions (permissions in the context of the user). Add the following permissions, if not already defined:

  • User.Read
  • email
  • offline_access
  • OpenId
  • profile

In case you are interessted in knowing more about the offline_access permission, you can read this article.

Afer clicking save make sure to click Grant admin consent for … button to grant these permissions within this tenant. So all users of this tenant do not have to explicitly consent to your MS-Teams App.

Finally select Authentication under the Manage section to add a redirect url for access tokens. We will add the server part later!

  • Click +Add a platform and select Web
  • Add a redirect Url to your application: https://demo.ngrok.io/auth-end
  • Scroll down to Implicit grant section and make sure that we can obtain the tokens from the authorization endpoint. Select both options:
    • ID-Token (Checked)
    • Access-Token (Checked)

Update your Teams Application Manifest and redeploy

After we have registered our AAD Application we want to configure our MS-Teams App to use it.

Open your Visual Studio project and click CTRL+Q to get to the general search. Type "teams" to get the option to view the Microsoft Teams Tool Kit.

As before click edit app-package and select development (some uid). Under Domains and permissions set:

  • AAD App ID: previously created app id: a97275e3-965d-4076-90dd-76cce240e8fb
  • Single Sign On: previously created app uri: api://demo.ngrok.io/a97275e3-965d-4076-90dd-76cce240e8fb

Click Update to update the application package.

This will add this section to the manifest:

...
  ],
  "validDomains": [],
  "webApplicationInfo": {
	    "id": "a97275e3-965d-4076-90dd-76cce240e8fb",
	    "resource": "api://demo.ngrok.io/a97275e3-965d-4076-90dd-76cce240e8fb"
  }
}

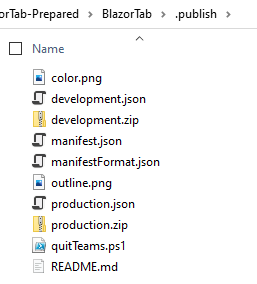
Make sure to use your own AppID/URIs and remove your app from teams and redeploy the app with the new development.zip file!

Getting the Auth-Token

Now let’s write some code to get the Auth-Token that we can later use to get access tokens for MS-Graph and our own API.

First add this javascript code to the index.html page. Again we use the MS-Teams SDK to get the auth token.

function getClientSideToken() {
  try {
          return new Promise((resolve, reject) => {
          console.log("Get auth token from Microsoft Teams");
          microsoftTeams.authentication.getAuthToken({
              successCallback: (result) => {
                  resolve(result);
              },
              failureCallback: function (error) {
                  alert(error);
                  reject("Error getting token: " + error);
              }
          });
      });
  }
  catch (err) {
      alert(err.message);
  }
}

From Blazor we can call this function as we did before by adding a new button and a call to the Javascript Runtime:

...
<p>Current User: @userName</p>
<p>AuthToken: @authToken</p>
...
<button class ="btn btn-primary"  @onclick="IncrementCount">Click me</button>
...
<button class ="btn btn-primary"  @onclick="GetUserName">Get UserName</button>
<br />
<button class="btn btn-light" @onclick="GetAuthToken">Get Auth-Token</button>
	@code {
...
private async Task GetUserName()
{
    userName = await JSRuntime.InvokeAsync<string>("GetUPN");
}
private string authToken = string.Empty;
 
private async Task GetAuthToken()
{
    authToken = await JSRuntime.InvokeAsync<string>("getClientSideToken");
}
...

Rebuild your application and run it in Visual Studio Debugger. Make sure you have updated your Teams app, then start teams and reload your personal tab. Initialize the Teams-SDK and then try to get the auth token.

Copy the authtoken and paste it to a https://jwt.ms or https://jwt.io to examine the auth token.

That’s it for today! See you tomorrow!

AndiP

Blazor MS-Teams Tab App Series – Part 3

Welcome to the forth post of a series that will show you how you can write a Microsoft Teams Application with Blazor Webassembly.

You will find the complete source code in this github repository. I placed my changes in different branches so you can easily jump in at any time.

Accessing Teams SDK from Blazor

Before we try to abstract the JavaScript away from our Blazor Application we take a climpse to the JavaScript-World and how we interact from there with our Blazor application.

Before you can access the MS-Teams Context you need to initialize the SDK, which can be simple done by calling the initialize method! The Context contains various key/values where one is the user principal name (upn).

I put these two functionalities in two javascript functions and added this to my index.html page.

Add this code to BlazorTeamApp.Client/wwwroot/index.html:

<script>
var _context;

function InitializeTeamsContext() {
    console.log("InitializeTeamsContext called...");
    try {
      // Initialize SDK
      microsoftTeams.initialize();
      // Fetch MS-Teams Context and store it in the _context variable
      microsoftTeams.getContext((context, error) => {
      _context = context;
    });
  }
  catch (err) {
    alert(err.message);
  }
}

function GetUPN() {
  console.log("GetUPNCalled");
  // Get User Principal Name
  let userName = Object.keys(_context).length > 0 ? _context['upn'] : "";
  return userName;
}
</script>

So how do we call these JavaScript functions from Blazor? By using the JSRuntime class. We inject a instance to our Blazor Page using the @inject command. In the future we want to initialize MS-Teams when the page loads. Right now we require the user to click the buttons in the right order:

Edit BlazorTeamApp.Client/Pages/Tab.razor

@page "/tab"
@inject IJSRuntime JSRuntime;
 
<h1>Counter</h1>
 
<p>Current count: @currentCount</p>
<p>Current User: @userName</p>
 
<button class="btn btn-primary" @onclick="IncrementCount">Click me</button>
<button class="btn btn-primary" @onclick="InitTeams">Init Teams</button>
<button class="btn btn-primary" @onclick="GetUserName">Get UserName</button>
 
@code {
    private int currentCount = 0;
    private string userName = string.Empty;
 
    private void IncrementCount()
    {
        currentCount++;
    }
 
    private async Task InitTeams()
    {
        await JSRuntime.InvokeVoidAsync("InitializeTeamsContext");
    }
    private async Task GetUserName()
    {
        userName = await JSRuntime.InvokeAsync<string>("GetUPN");
    }
}

Hit F5 in Visual Studio to start the application again and switch back to MS-Teams. Hit the refresh button to reload you Team-Tab.

Then click the Init Teams button to initialize the Teams SDK and then Get UserName to display the username of the current logged in user in teams.

Voila! Your first information fetched from MS-Teams. In the next blog post I show you how to get hands on the client auth token that we will use later to get access tokens for Graph and our own services.

That’s it for today! See you tomorrow!

AndiP

Blazor MS-Teams Tab App Series – Part 2

Welcome to the third post (developers count from 0) of a series that will show you how you can write a Microsoft Teams Application with Blazor Webassembly.

You will find the complete source code in this github repository. I placed my changes in different branches so you can easily jump in at any time.

Configure the Teams Deployment package

Today we’ll have a look at the teams application deployment package and manifest. Each MS-Teams project contains two deployment packages. One for development and one for production. You can configure some basic settings with the corresponding development.json and production.json files:

There are more files in that folder as we can see if we open explorer:

The Microsoft Teams Toolkit extension will generate the zip-files which are the deployment packages. If you open a zip file you will see that it contains a manifest.json file.

Instead of editing these files manually we use the integrated Manifest Editor that come with the Teams Toolkit extension. It can be easily found by opening the general search in Visual Studio CTRL+Q and typing teams:

Edit app package by selecting the menu "Edit app package":

Then select development! It is necessary that you are logged in to your tenant (Use Welcome Menue and the Button in the upper right). If you do this the first time, the toolkit will generate a unique ID for your teams application.

Unfortunatly when you move your project somewhere else and other constellations i have not figured out yet it can happen that it cannot find your deployment package and you end up with this weird error message:

What now, you might ask? Well, I solved it by removing the GUID from the development.json file. No worries you won’t loose anything aside of your UID:

{
  "baseUrl0": "https://localhost:44310",
  "version": "1.0.0",
  "appname": "BlazorTab",
  "fullappname": "BlazorTab",
  "teamsAppId": "3bffcaf5-3c25-48a6-9128-7be501f5516e" // <--- Remove this value
}
{
  "baseUrl0": "https://localhost:44310",
  "version": "1.0.0",
  "appname": "BlazorTab",
  "fullappname": "BlazorTab",
  "teamsAppId": ""
}

Then try to edit the manifest again. MS Teams Toolkit will now generate a new UID and you should be good to go again. Sometimes the right editor window does not render correctly. Selecting the left topics "App details" & "Tabs" back and forth will fix this.

App details is quite self explanatory and I won’t walk you through that in detail. Just make sure that the URLs are adapted to your ngrok domain.

For example:

Under Capabilities / Tab we configure our TAB application. If you have a TAB that can be added to a team you need to provide a configuration URL where your end users will customize you Teams App for that Team-Channel. Configure a URL there. For example:

By clicking on the … right to the configuration url you can also define the scope of your Teams Tab application and if the configuration is readonly.

Add a many personal tabs as you like. Configure them accordingly. Each tab should have a name and content url. For example:

Microsoft Teams will replace some variables in the content URL. In the example above it will replace {entityid} with "index". You can find a list of supported context keys here.

You could f.e. create multiple tabs with the same content URL but using different EntityIDs.

Deploy to teams (Sideload)

  1. Open the Microsoft Teams Client
  2. In the application bar select Apps and then Upload a custom app (left at the bottom)

Select the file development.zip from your .publish folder, install the application and pin it to your left Teams Taskbar.

Make sure ngrok and your Teams App is running in Visual Studio before you click on you application icon. If you have done everything right, you should now see your /tab razor page within Microsoft Teams.

That’s it for today! See you tomorrow!

AndiP

Blazor MS-Teams Tab App Series – Part 1

Welcome to the second post of a series that will show you how you can write a Microsoft Teams Application with Blazor Webassembly.

You will find the complete source code in this github repository. I placed my changes in different branches so you can easily jump in at any time.

Today we continue with our base MS-Teams project. Since our service must run on a public available domain I recommend using NGROK (yesterday I learned it is spoken like this: [n g rock] ) which is a tunneling service that offers a public URL that will tunnel a request to your local machine.

An additional benefit is that NGROK also provides a SSL-Endpoint terminating at the tunneling site, so you can easily server HTTPS without worring about certificates.

Warning: If you use the free edition of NGROK your domain name will change every hour or so. Since we will also configure Azure Active Directory Applications in AAD this can be tedious to constantly adapt. I would recommend to buy the base version or to host the application on your domain.

Let’s start! Add a new "Blazor"-Project in Visual Studio to our existing solution:

a. Project-Name: BlazorTeamApp
b. Select "Blazor WebAssembly App"
c. Configure for HTTPS: YES
d. ASP.NET Core hosted: YES

Tab-Route

Next we reuse the Counter.razor page as our first tab page. To name it properly we rename Counter.razor to Tab.razor. Make sure that all your razor pages follow the Pascal naming convention otherwise Visual Studio will complain!

In the file BlazorTeamApp.Client/Pages/Tab.razor replace

  • @page "/counter" with @page "/tab"

Remove Sidebar

Since Teams has it’s own navigation we remove the sidebar by removing following code in the file BlazorTeamApp.Client/Shared/MainLayout.razor:

<div class="sidebar">
    <NavMenu />
</div>

Add the MS-Teams SDK Javascript Library

Right click the project "BlazorTeamApp.Client" and select "Manage Client Side Libraries". Then replace the content of the file libman.json with the following code.

{
  "version": "1.0",
  "defaultProvider": "cdnjs",
  "libraries": [
    {
      "provider": "jsdelivr",
      "library": "@microsoft/teams-js@1.8.0",
      "destination": "wwwroot/scripts/teams"
    }
  ]
}

The folder BlazorTeamApp.Client/wwwroot/scripts/teams should have been created!

Lets add the MicrosoftTeams.js file to the index.html page to have it run at startup!

Edit BlazorTeamApp.Client/wwwroot/index.html

...
    
    <!--Reference to the MS Teams Script added with libman -->
    

...

Do not use IIS Express

IIS Express does not allow your site beeing called from outside. So NGROK can not tunnel to a IIS Express hosted site running on an address like "https://localhost:44383/tab&quot;.

Open the project settings of BlazorTeamApp.Server and select the settings for Debug:

  1. Change the profile to "BlazorTeamApp.Server"
  2. Set Launch Browser to: http://localhost:5000

Since we use the NGROK Https Endpoint we remove the HttpsRedirection in Startup.cs:

Comment out the HttpsRedirection in "BlazorTeamAp.Server/Startup.cs":

...
// app.UseHttpsRedirection();
app.UseBlazorFrameworkFiles();
...

Once you have setup NGROK with your account open a terminal window and tunnel port 5000 to your NGROK sub domain. Adapt the region depending on your setup:

	ngrok http -region=eu -hostname=".eu.ngrok.io" 5000

Start the "BlazorTeamApp.Server" (not IIS Express!) in the debugger and validate that you can browse the following urls (replace demo.eu.ngrok.io with your ngrok domain):

Test the TAB and Web API:

That’s it for today! See you tomorrow!

AndiP

Blazor MS-Teams Tab App Series – Part 0

This is the first post of a series that will show you how you can write a Microsoft Teams Application with Blazor Webassembly. This post will guide you to get everything setup to be able to follow along the series.

You will find the complete source code in this github repository. I placed my changes in different branches so you can easily jump in at any time.

First I recommend setting up you own O365 tenant for development, as you might not have administrative priviledges on your production tenant.

  1. Setup your own Office 365 – Development Environment

  2. Navigate to Teams Admin Center, which also can be found in the M365 Admin Center under More/Admin Centers/Teams

    • Under Teams Apps / Manage Apps click on the upper right button Org-wide app settings and make sure to activate "allow interaction with custom apps
    • Unter Teams Apps / Setup policies / Global (Org-wide default) activate the option Upload custom apps and save! This can take up to 24 hours
  3. Enable the Developer Preview in Microsoft Teams Desktop Client

    All the settings in step 1 are required to be completed to be able to see those options!

    • Start TeamsApp and select your profile picture / About / Developer Preview and accept. Then log in again!
  4. Enable Developer Tools in Teams App (requires Developer Preview)

    • Close TeamsApp (Quit in Taskbar!)
    • Restart TeamsApp and Log-In again
    • Open a TAB-Application
    • Right-Click the Taskbar-Icon of Microsoft Teams App / Open Dev Tools (Context Menu)
  5. Install App Studio Teams App

    This teams application can help you craft your application manifest.

    • In Microsoft Teams App click on Apps Icon (Taskbar) then search for App Studio and install.
  6. Take the blue/red pill aka choose between .NET and React

    A MS Teams TAB application is basically a website running within an iframe in Teams. So basically you can write your application in any language and framework. To interact with teams you need to work with the JavaScript API. Microsoft offers extensions for Visual Studio Code and Visual Studio that can ease the setup of your projects. As of today Visual Studio Code creates a React-Template while Visual Studio will create an ASP.NET Core 3.1 application.

    • Visual Studio Code (only React-Template with NodeJS)

      • Add Extension Microsoft Teams Toolkit
    • Visual Studio (.NET Core 3.1)

      • Add Extension Microsoft Teams App After installing the extension you can add a new Microsoft Teams App.

If you want to follow my Step-by-Step Teams-App series please create a new Microsoft Teams App BlazorTab.

    Options:
        -  .NET Framework 4.8 (No worries it creats a .NET Core 3.1 App)
	Capabilities
		- Select TAB
		- Select Both 

    Visual Studio will create a new solution with two folders:
    - .publish
    - Tabs (.NET Core App 3.1)

That’s it for today! See you tomorrow!

AndiP

Accessing AAD OAuth2 protected API from PHP

Overview

What are we building today?

We do have a Web APP API running in an Azure App Service that is protected with Azure Active Directory (AAD). We want to access this webservice from a PHP website. In our setup the php website runs in a local docker container. The first and foremost goal is to show how we can get hands on the access token from our PHP application.

  1. Request the Index.php through http://localhost:90
  2. Use the OAuth2 library thenetworg/oauth2-azure to request an access token
  3. Authenticate against the app phpDemo in AAD and request access to ressource weatherapi
  4. Return the access token
  5. Return access token. Here you could call the web service with the returned bearer token
  6. Render the token on the website
  7. Use Postman to call the protected webservice

In the following sections contain a step by step guidance how to implement this scenario.

Creating the API-Application

Open Visual Studio 2019 and create a new „ASP.NET Core Web App“

  • Name: weatherapi
  • Plattform: .NET Core / ASP.NET Core 3.1
  • Template: API

In the solution explorer right click the project – Publish…

  • Azure
  • Azure App Service (Windows)
  • Select your subscription
  • + Create a new Azure App Service …
    • Name: weatherapi (select a unique name)
    • Subscription: Your Subscription
    • Resource Group: New… (phpdemo)
    • Hosting Plan: New… (testplan)

    • Click Create to create the Azure Resources
  • Select the web app and click „Finish“
  • Click Publish to publish the WebApp

Now you should be able to call your webservice under following URL: https://weatherapi.azurewebsites.net/weatherforecast

Create AAD App for ASP.NET API with weather.read

"appRoles": [
{
"allowedMemberTypes": ["Application" ],
"description": "Weather API",
"displayName": "Weather API",
"id" : "4B*************08",
"isEnabled": true,
"lang" : null,
"origin": "Application",
"value": "weather.read"
}
],

Securing the API Application with Easy Auth

  • Navigate to Azure App Services
  • Select your weatherapi Application
    • Under Settings click Authentication / Authorization
    • Turn App Service Authentication ON
      • In the drop down select „Log in with Azure Active Directory“
      • Click „Azure Active Directory“
      • Select Advanced
      • Copy ClientID to Client ID field
      • Copy „OpenID Connect metadata document“ to Issuer Url
      • Click OK
    • Save

Take care with the Issuer URL, because your application might break if you use JWT-Tokens with a „wrong“ issuer. JWT-Tokens with Ver 1.0 have a different Issuer than JWT-Tokens Ver 2.0. 

Open the  OpenID Connect Metadata Url in a browser and locate the „issuer“ element. It will be set to:

If you use V1 Tokens you need to set Issue in Easy Auth to

The „iss“ element in the tokens must match the issuer configured in EasyAuth! Read more on Access Tokens V1/V2 here!

Create AAD App for PHP Application

  • Open https://portal.azure.com
  • Navigate to Azure Active Directory / App registrations
  • + New registration
    • Name: phpdemo
    • Account Types: Single Tenant
    • Redirect URI: Web – http://localhost:90
    • Register
  • Write down ClientID. In my case it is: c9e*****9ea
  • Click on the button „Endpoints“
  • Click on Manage – Certificates & secrets
    • + New client secret
      • Name: mysecret
      • Expiry: 2 Years
      • Copy down the Secret (we need that later). In my case its: AKX**********
  • Click on Manager – API Permissions
    • + Add a permission
      • Select „My APIs“-Tab
      • Select „weatherapi“
      • Select „Application permissions“
      • Select „weather.read“
      • Add Permissions
    • Note the orange exclamation sign! Use „Grant admin consent for…“ button next to „+ Add permission“ and confirm with Yes.

Creating the PHP Application

Since I did not want to install all PHP stuff on my machine I decided to develop my example in a docker container. Thanks to the TruthSeekers who wrote this excellent post on how to do exactly that. You can clone the source code here.

After I cloned the git repository I had to adopt my docker-compose.yml file slightly since port 80 / 8080 are already consumed on my machine.

... 
ports: 
- 90:80
... 
ports:
- 9090:8080 
... 
Then I simply ran
  • docker-compose up -d

which brought up all containers, including SQL, which we won’t be needing now. Since we need some OAuth-Libraries for PHP, I decided to use the package manager tool composer.  

I did a quick „docker container list“ to figure out the php container.

Then with

  • docker exec -it php-docker-simple_php_1 bash

I connect to the bash of the running container.

Execute the following statements to install composer:

apt-get update
apt-get install zip unzip
Cd ~
php -r "copy('https://getcomposer.org/installer', 'composer-setup.php');"
php -r "if (hash_file('sha384', 'composer-setup.php') === '795f976fe0ebd8b75f26a6dd68f78fd3453ce79f32ecb33e7fd087d39bfeb978342fb73ac986cd4f54edd0dc902601dc') { echo 'Installer verified'; } else { echo 'Installer corrupt'; unlink('composer-setup.php'); } echo PHP_EOL;"
php composer-setup.php
php -r "unlink('composer-setup.php');"

As OAuth2 library I want to use „thenetworg/oauth2-azure“ which can be found here.
It is based on the OAuth2 Library „thephpleague/oauth2-client“ which can be found here.

Then install this package to the sample which resides in /var/www/html:

 
cd /var/www/html
php ~/composer.phar require thenetworg/oauth2-azure

Exit to the terminal and start VS-Code in the local directory or any other editor of your choice

For our sample we need following information which we collected earlier:

  • Client ID of the phpdemo app
  • ClientSecret of the phpdemo app
  • redirectUri of phpdemo app
  • aad tenant id
  • OAuth 2.0 Authorize Url
  • OAuth 2.0 Token Url
  • Client ID of the weatherapi app

We need all these values and add them in the following code fragment which initializes the oauth provider for Azure AAD:

$provider = new TheNetworg\OAuth2\Client\Provider\Azure([
'clientId' => 'c9e*****9ea',
'clientSecret' => 'AKX********',
'redirectUri' => 'http://localhost:90',
'tenant' => 'e2*******3d',
'urlAuthorize' => 'https://login.microsoftonline.com/e2*******3d/oauth2/v2.0/authorize',
'urlAccessToken' => 'https://login.microsoftonline.com/e2*******3d/oauth2/v2.0/token',
'urlAPI' => 'b37*******b02',
'scope' => 'b37*******b02/.default'
]);
$provider->defaultEndPointVersion = TheNetworg\OAuth2\Client\Provider\Azure::ENDPOINT_VERSION_2_0;

We can now retrieve the access token with the following code:

$accessToken = $provider->getAccessToken('client_credentials', [
'scope'=> $provider->scope
]);
Here is the complete code of src/index.php to get and display the access token that we can then use to make a request to our api service:

<?php
echo "OAuth Sample<br/>";
/* Make sure we include necessary libraries */
require_once(__DIR__."/vendor/autoload.php");
/* Initialize provider */
$provider = new TheNetworg\OAuth2\Client\Provider\Azure([
    'clientId' => 'c9e*****9ea',
    'clientSecret' => 'AKX********',
    'redirectUri' => 'http://localhost:90',
    'tenant' => 'e2*******3d',
    'urlAuthorize' => 'https://login.microsoftonline.com/e2*******3d/oauth2/v2.0/authorize',
    'urlAccessToken' => 'https://login.microsoftonline.com/e2*******3d/oauth2/v2.0/token',
    'urlAPI' => 'b37*******b02',
    'scope' => 'b37*******b02/.default'
]);
$provider->defaultEndPointVersion = TheNetworg\OAuth2\Client\Provider\Azure::ENDPOINT_VERSION_2_0;

try {
    $accessToken = $provider->getAccessToken('client_credentials', [
        'scope' => $provider->scope
    ]);
} catch (\League\OAuth2\Client\Provider\Exception\IdentityProviderException $e) {
    // Failed to get the access token
    exit($e->getMessage());
}
echo "Access-Token:";
echo $accessToken;

Now we can call http://localhost:90 on our machine and retrieve the JWT Bearer Token.
Open Postman and make a get request to:

In the Authorization TAB select type: „Bearer Token“ and paste the access token to the token field.
If you hit Send now, you will retrieve the results of the weatherforecast.

That’s it. Thanks
Andreas

Application Insights Codelens Configuration

In my talk today at the Global Azure Bootcamp in Linz #gab #gab2019 I received a question regarding the source of Application Insights (AI) metrics that show up in Codelens.

How does Visual Studio know to which AI-Instance it should relate to?
CodeLens01

This setting can be easily find by the Visual Studio 2019 „Search“-Functionality which can be accessed with the shortcut CTRL + Q and by entering „Configure Application Insights„. You can also find the settings under the menu „Project-Application Insights-Configure Application Insights…„.

I think these settings are quite self explanatory 🙂

CodeLensConfig

Thanks Anton for asking this question!

Enjoy and have a great day

yours AndiP


Metrics in CosmosDB (DocumentDB-Focus)

Update 19.11.2018: Checkout my experimental implementation of a Metrics-Client Library for CosmosDB on github.

With Azure Monitor you have a single way to access metrics for a lot of supported azure resources. My personal guess on how the implemented Azure Monitor is that each Azure Resource provider (like Microsoft.DocumentDB) built an addon-provider „microsoft.insights“ that is used by Azure Monitor.

Azure Monitor only supports these metrics for CosmosDB. The Azure Monitor REST API documentation to query metrics describes the input and output values.

Of these I found these most relevant for the DocumentDB-API:
– Consumed request units: TotalRequestUnits (Unit:Count, Aggregation: count/total)
– Number of requests made: TotalRequests (Unit:Count, Aggregation: count/total)

which can be filtered by
– DatabaseName
– CollectionName
– Region
– StatusCode

Update: During development of the sample I noticed that the documentation is quite outdated. The new Version „2018-01-01“ supports additional metrics that are not documented on the page above. Here the DocumentDB relevant ones:
– AvailableStorage
– DataUsage
– DocumentCount
– DocumentQuota
– IndexUsage
– ReplicationLatency
– ServiceAvailability

(Un)Fortunately CosmosDB provides other interesting metrics as well that cannot be retrieved by Azure Montior. You might have noticed additional metric data in the metrics blade of CosmosDB like:

  • Available Storage
  • Data Size
  • Index Size
  • Max RUs per Second (filterd on a collections partition in a specific region)
  • Observed Read Latency
  • Observed Write Latency

These and more metrics can be retrieved directly from the CosmosDB Azure Resource Provider. This was/is the „old way“ to retrieve metrics before the arrival of Azure Monitor, if i got that right. The reference chapter describes all the various metrics you can consume from CosmosDB Resource Provider.

While Azure Monitor provides a nice nuget package (enable preview!) that you can use to access Azure Monitor metrics, you need to work with the REST-API to access the other metrics.

In this article I will focus on the DocumentDB metrics retrieved by REST (also the Azure Monitor ones). You can find a Azure Monitor Sample with .NET Core here.

Structure of Uri(s) for the Metric REST interfaces

The {resourceUri} is actually a path to the requested Azure resource. Azure Monitor basically always uses the path to the CosmosDB account. If you work directly with the Azure Resource Provider of CosmosDB you need the other paths to:

Resource Uri – Definition {resourceUri}

Resource Uri -> Database Account

This path is basically used whenever we work with Azure Monitor REST-API
– subscriptions/{subscriptionId}/resourceGroups/{rgName}/providers/Microsoft.DocumentDb/databaseAccounts/{cosmosDBAccountName}

Resource Uri -> DocumentDB Database
– subscriptions/{subscriptionId}/resourceGroups/{rgName}/providers/Microsoft.DocumentDb/databaseAccounts/{cosmosDBAccountName}/databases/{databaseResourceId}

Resource Uri -> DocumentDB Collection
(Mostly used in Azure resource Metric queries)
– subscriptions/{subscriptionId}/resourceGroups/{rgName}/providers/Microsoft.DocumentDb/databaseAccounts/{cosmosDBAccountName}/databases/{databaseResourceId}/collections/{collectionResourceId}

Resource Uri -> DocumentDB Collection Partition in a specific region
– subscriptions/{subscriptionId}/resourceGroups/{rgName}/providers/Microsoft.DocumentDb/databaseAccounts/{cosmosDBAccountName}/region/{regionName}/databases/{databaseResourceId}/collections/{collectionResourceId}/partitions

Region Names {regionName}

You can find out which regions your CosmosDB is available by querying the ARM REST API of the CosmosDB Account Azure Resource. Use the „Resources Get REST API“. For CosmosDB you find the documentation on how to retrieve the details of the CosmosDB Account Resource here.

The documentations misses out additional values in „properties“. While „enableAutomaticFailover“ and „enableMultipleWriteLocations“ (multimaster) is quite easy to guess I have no idea what „capabilities“ and „configurationOverrides“ will contain (maybe other API’s?):
– capabilites: []
– configurationOverrides: {}
– enableAutomaticFailover: false
– enableMultipleWriteLocations: false

Here a non exhaustive list of potential regions:

  • North Europe
  • West Europe

Request Examples

CosmosDB Resource Provider GET metrics sample

splitted in multiple rows for better reading
This request will fetch the „Available Storage“, „Data Size“, „Index Size“ in the time frame:
2018-10-10T06:55:00.000Z to 2018-10-10T07:55:00.000Z with a 5 minute interval (PT5M). Since the resource uri path points to a specific collection, only the data of this collection is retrieved!

    https://management.azure.com/
    subscriptions/12a34456-bc78-9d0e-fa1b-c2d3e4567890/resourceGroups/demoRG/
    providers/Microsoft.DocumentDb/databaseAccounts/demodocs/
    databases/6XAQAA==/collections/6XAQAITyPQA=/metrics?
    api-version=2014-04-01
    &$filter=
        (
        name.value eq 'Available Storage' or 
        name.value eq 'Data Size' or 
        name.value eq 'Index Size'
        ) and 
        startTime eq 2018-10-10T06%3A55%3A00.000Z and 
        endTime eq 2018-10-10T07%3A55%3A00.000Z and 
        timeGrain eq duration'PT5M'

Azure Monitor GET metrics sample

splitted in multiple rows for better reading

This request will fetch the „TotalRequests“-metric within the timespan from: 10.Oct. 2018 07:57 to 10.Oct. 2018 08:57 (one hour). The result will be delivered in 1 Minute invervals (PT1M). In this case we want all Databases, Collections, Regions and StatusCodes.

    https://management.azure.com/
    subscriptions/12a34456-bc78-9d0e-fa1b-c2d3e4567890/resourceGroups/demoRG/
    providers/Microsoft.DocumentDb/databaseAccounts/demodocs/
    providers/microsoft.insights/metrics?
    timespan=2018-10-10T07:57:00.000Z/2018-10-10T08:57:00.000Z
    &interval=PT1M
    &metric=TotalRequests
    &aggregation=total
    &$filter=DatabaseName eq '*' and CollectionName eq '*' and Region eq '*' and StatusCode eq '*'
    &api-version=2017-05-01-preview

The azure portal on the CosmosDB metrics blade currently uses this API-Version: 2017-05-01-preview. There is a more recent one „2018-01-01“. To get the supported API-Versions send in a wrong one :-).

Note that the new version requires „metricNames“ instead of „metric“!

    https://management.azure.com/
    subscriptions/12a34456-bc78-9d0e-fa1b-c2d3e4567890/resourceGroups/demoRG/
    providers/Microsoft.DocumentDb/databaseAccounts/demodocs/
    providers/microsoft.insights/metrics?
    timespan=2018-10-10T07:57:00.000Z/2018-10-10T08:57:00.000Z
    &interval=PT1M
    &metricNames=TotalRequests
    &aggregation=total
    &$filter=DatabaseName eq '*' and CollectionName eq '*' and Region eq '*' and StatusCode eq '*'
    &api-version=2018-01-01

Other intervals:
– PT1M (1 minute)
– PT5M (5 minutes)
– PT1H (1 hour)
– PT1D (1 day)
– P7D (7 days)

Azure ComosDB requests the Azure Portal uses for the metrics blade

Overview TAB

Number of requests (aggregated over 1 minute interval)

  • TYPE: Azure Monitor (microsoft.insights provider)
  • ResourceUri -> Database Account
  • API-Version -> 2017-05-01-preview
  • timespan -> 2018-10-10T07%3A57%3A00.000Z/2018-10-10T07%3A58%3A00.000Z
  • metric -> TotalRequests
  • aggregation -> total
  • interval -> PT1M
  • $filter ->
    DatabaseName eq 'databaseName' and 
    CollectionName eq '*' and 
    Region eq '*' and 
    ddStatusCode eq '*'

Number of requests (counted over 1 minute interval)

  • TYPE: Azure Monitor (microsoft.insights provider)
  • ResourceUri -> Database Account
  • API-Version -> 2017-05-01-preview
  • timespan-> 2018-10-10T06%3A58%3A00.000Z/2018-10-10T07%3A58%3A00.000Z
  • metric-> TotalRequests
  • aggregation-> count
  • interval-> PT1M
  • $filter ->
    DatabaseName eq 'databaseName' and 
    CollectionName eq 'colName' and 
    StatusCode eq '*'

Data and Index storage consumed

  • TYPE: Azure Resource Provider Metric
  • ResourceUri -> DocumentDB Collection
  • API-Version -> 2014-04-01
  • $filter->
    (
    name.value eq 'Available Storage' or 
    name.value eq 'Data Size' or 
    name.value eq 'Index Size'
    ) and 
    endTime eq 2018-10-10T07%3A55%3A00.000Z and 
    startTime eq 2018-10-10T06%3A55%3A00.000Z and 
    timeGrain eq duration'PT5M'

Documentation for fetching metrics from the Collection:

Max consumed RU/s per partition key range

  • TYPE: Azure Resource Provider Metric
  • ResourceUri -> DocumentDB Collection
  • API-Version -> 2014-04-01
  • $filter->
    (
        name.value eq 'Max RUs Per Second'
    ) and 
    endTime eq 2018-10-10T07%3A58%3A00.000Z and 
    startTime eq 2018-10-10T06%3A58%3A00.000Z and 
    timeGrain eq duration'PT1M'

Depending on the given resourceUri path the result will vary. The portal uses these three combinations of ResourceUri(s):

  • DocumentDB Database
  • DocumentDB Collection
  • DocumentDB Collection Partition in a specific region

You can find the respective documentation here:

For the „DocumentDB Collection Partition in a specific region“ I missed out the documented „partitionId“-value in my results. I got only „partitionKeyRangeId“. I also got a „region“-value for each entry in my value array. The portal uses the MAX value of all retrieved metric values to display the MAX-RUs for a partition.

Throughput TAB

Number of requests (aggregated over 1 minute interval)

see next section, uses the results from the same query

Number of requests exceeded capacity (aggregated over 1 minute interval) Status:429

This request had been used in the „Overview-Tab“ as well. The result is basically grouped by Database, Collection and Statuscode. So we can filter the 429 requests to get result we need.

  • TYPE: Azure Monitor (microsoft.insights provider)
  • ResourceUri -> Database Account
  • API-Version -> 2017-05-01-preview
  • timespan-> 2018-10-10T08%3A30%3A00.000Z/2018-10-10T09%3A30%3A00.000Z
  • metric-> TotalRequests
  • aggregation-> count
  • interval-> PT1M
  • $filter ->
    DatabaseName eq '*' and 
    CollectionName eq '*' and 
    StatusCode eq '*'

The generic result structure is documented here.

Within the the value the Metric ID will be „/subscriptions/12a34456-bc78-9d0e-fa1b-c2d3e4567890/resourceGroups/myRG/providers/Microsoft.DocumentDb/databaseAccounts/cosmosDBAccount/providers/Microsoft.Insights/metrics/TotalRequests“.

The timeseries array contains entries that basically represent the groups (by DBName, CollectionName and Status Code). Each group contains (in this case 60 items, one per minute PT1M) all the values for that group. The metadatavalues.name will be one of the following:

  • collectionname
  • databasename
  • statuscode

End to end observed read latency at the 99th percentile – metrics – Azure Resource

Latency for a 1KB document lookup operation observed in North Europe in the 99th percentile

  • TYPE: Azure Resource Provider Metric
  • ResourceUri -> Database Account
  • API-Version -> 2014-04-01
  • $filter->
    (
        name.value eq 'Observed Read Latency' or 
        name.value eq 'Observed Write Latency'
    ) and 
    endTime eq 2018-10-10T15%3A00%3A00.000Z and 
    startTime eq 2018-10-10T14%3A00%3A00.000Z and 
    timeGrain eq duration'PT5M'

I was really missing out a single page that describes all the metric possibilities with CosmosDB. I hope that this fills the gap.

Enjoy and have a great day!

AndiP

Testing with Azure CosmosDB Emulator in Azure DevOps CI/CD Pipeline with ASP.NET Core

During local development, I often use Azure CosmosDB emulator instead of having a running instance in the cloud. Naturally, my unit tests also use the emulator.

Since our gated check-in requires all unit tests to complete we need to find a way to complete all tests in Azure DevOps.

Luckily there is this handy pipeline task from the Visual Studio Marketplace at hand!

In case you never heard of Azure DevOps (formerly known as VSTS) or Azure pipelines you can get a good overview here. You can sign up for free for Azure DevOps here.

Setting up an ASP.NET Core sample

For our purpose I have created a new MVC Asp.NET Core 2.1 web application in Visual Studio including an additional .NET Core MSTest project ‚EmulatorDemoTests‘ which will contain my unit tests.

In the sample code I use the slightly adapted class DocumentDBRepository from the ToDo-App CosmosDB sample. We add the following nuget packages:
– „Microsoft.Azure.DocumentDB.Core“
– „System.Configuration.ConfigurationManager“.

For the test project i created a file „.runsettings“, which is required to configure the access to our local cosmosdb instance.

<RunSettings>
    <TestRunParameters>
    <!-- Path to the local CosmosDB instance -->
    <Parameter name="endpoint" value="https://localhost:8081" />
    <!-- Wellknown Secret to acccess the emulator instance -->
    <Parameter name="authKey" value="C2y6yDjf5/R+ob0N8A7Cgv30VRDJIWEHLM+4QDU5DE2nQ9nDuVTqobD4b8mGGyPMbIZnqyMsEcaGQy67XIw/Jw==" />
    <!-- Database and collection name -->
    <Parameter name="database" value="demodb" />
    <Parameter name="collection" value="democol" />
  </TestRunParameters>
</RunSettings>

In order to have Visual Studio pick up that file, you need to set the Test Settings file with following commands:
– Test – Test Settings – Select Test Settings File (Select your .runsettings file)

In the „CosmosDBTest“ class I ensure that our DocumentDBRepository is initialized properly with the settings from .runsettings file:

[TestInitialize()]
public void CosmosDBInitialize()
{
    this._EndpointUrl = TestContext.Properties["endpoint"].ToString();
    this._AuthKey = TestContext.Properties["authKey"].ToString();
    this._DatabaseName = TestContext.Properties["database"].ToString();
    this._CollectionName = TestContext.Properties["collection"].ToString();
    DocumentDBRepository<Person>.Initialize(
            this._EndpointUrl, 
            this._AuthKey, 
            this._DatabaseName, 
            this._CollectionName);
}

I have written a simple test case which will suffice for our little sample.

[TestMethod]
public async Task TestInsertDocuments()
{
    var document = await DocumentDBRepository<Person>.CreateItemAsync(new Person
    {
        Age = 38,
        FirstName = "Andreas",
        LastName = "Pollak"
    });
    Assert.IsNotNull(document);
    Assert.IsFalse(string.IsNullOrEmpty(document.Id));

    var person = (await DocumentDBRepository<Person>.GetItemsAsync(
        p => p.LastName == "Pollak")).FirstOrDefault();

    Assert.IsNotNull(person);
    Assert.IsTrue(person.FirstName == "Andreas");
    Assert.IsTrue(person.LastName == "Pollak");
    Assert.IsTrue(person.Age == 38);
    await DocumentDBRepository<Person>.DeleteItemAsync(document.Id);
}

You can find the complete code on GitHub.

Setting up CI/CD pipeline in Azure DevOps

First of all you need an azure devops account. You can sign up for free for Azure DevOps here. After you have created a new DevOps Project (in this case with a GIT repository) you can add your source to the git repository like i did below:
Source Code

To enable Azure CosmosDB Emulator in you CI/CD pipelines you need to install the Azure DevOps pipeline task.
Navigate to the Azure CosmosDB Emulator Task in your browser and click „Get it free“ – Button. After authentication with either your organizational or Microsoft account you can choose the DevOps Account you want to install this task to. In case your devops account is located at https://youraccount.visualstudio.com your account will be listed as: „youraccount“.

Install to location

Click „Install“ and after the successful install „Proceed to organization“. Select your DevOps project.

Click the Pipelines menu and create a new pipeline by clicking on the „New pipeline“ button in the center of the screen.

Select Pipelines

First select your pipeline source. You have a varity of options to host your code including DevOps Repos, TFVC, GitHub, GitHub Enterprise, Subversion, BitBucket or any external git repository. In this case just use „Azure Repos Git“ as the source is stored in the DevOps project.

Select Source

Next choose from many available templates (which allow us also to build Python, Java,… code). Select „ASP.NET Core“ as our template:

Select AspNet Core Template

The initial pipeline looks like this. Since no emulator is running in the DevOps envionment the tests will fail.
Initial pipeline

And sure enough they fail:
Failed test run

To enable the Azure CosmosDB Emulator add an additional task to our devops pipeline. This task will run a docker container for windows containing an emulator instance. Since per default the agent host is Linux you need to switch the Build Agent from Linux to Windows:
Change Pipeline to Windows Agent

Now you can select the + sign in the agent job section and add a new task „Azure CosmosDB emulator“ from the „test“ category. Use drag n drop to move it between the tasks „Build“ and „Test“.

AddPipelineTask

It is important to know that the CosmosDB Emulator Task will export an pipeline variable „$(CosmosDbEmulator.Endpoint)“ which will contain the endpoint where the CosmosDB instance will be available.

You can configure your Emulator instance as you like. For example configure the consistency model or the amount of partitions to allocate,…

Now you need to configure the „Test .NET Core“ task to have the unit tests use the endpoint of the emulator you just created. While you can configure a runsettings file, there is currently no way to override parameters (see this open github issue).

Therefore you need to work around this limitation. First of all configure the test task to use a runsettings file that does not yet exist. Right now there is only a „.runnsettings“ file in that folder.

--configuration $(BuildConfiguration) --settings "$(Build.SourcesDirectory)\EmulatorDemo\EmulatorDemoTests\test.runsettings"

Configure NetCore Test Task

Next use a small powershell script task to create this file dynamically. Click on the +-Icon in the „Agent job“ section and find unter the category „Utility“ the task „PowerShell“. Place that script between „Run Azure CosmosDB Emulator“ and „Test .NET Core“.

Now you need to configure two pipeline parameters as environment variables within the script. Open the „Environment variables“ section and configure those values. Attention: Environment variables MUST NOT contain a „.“.

CosmosDbEmulatorEndpoint  = $(CosmosDbEmulator.Endpoint)
BuildSourcesDirectory     = $(Build.SourcesDirectory)

Set EnvVariables For PowerShell Script

Add your little script. Make sure to select Type = Inline. and copy the following script into the script text field.

# Create test.runsettings file
Write-Host CosmosDB Endpoint: $env:CosmosDbEmulatorEndpoint
Write-Host Source Path: $env:BuildSourcesDirectory

$sourceConfig = $env:BuildSourcesDirectory+"\EmulatorDemo\EmulatorDemoTests\.runsettings"

$parameter = Select-Xml -Path $sourceConfig -XPath '//Parameter[@name="endpoint"]'
$parameter.Node.value = $env:CosmosDbEmulatorEndpoint
$newFileName = $parameter.Path.Replace(".runsettings","test.runsettings")
$parameter.Node.OwnerDocument.Save($newFileName)

Add Script To Power Shell Task

And you are ready to roll! And the test run succeeds:

Test run succeeds

Have fun with Azure DevOps AndiP

Adding Changefeed support to CosmosDB Datamigration Tool

In a production environment I usually would use Azure Functions which use the Change Feed Processor Library internally to continuously push changes in my CosmosDB to other destination(s).

However, for some small testing scenarios, demos and also some coding fun, I decided to add ChangeFeed support to the Azure CosmosDB data migration tool (link to original version).

So with this special version of the Azure CosmosDB Data Migration Tool you have additional options for the DocumentDB-Source available unter „Advanced Options“:

Once you check „Use change feed of the collection“ you get following options:

You can select where you want start reading from the change feed. Either start at the creation time of the collection or select a specific date.  I admit I could have added a DateTime-Picker :-P.

At „File to read/store continuation tokens“ you can provide a file name to store the continuation tokens. If you re-run the wizard and provide the file again only the new updated documents will be processed.

Last but not least you need to set, if you want to update the provided continuation token file with the new continuation tokens which in most situations is desired.

Thnx

AndiP